Mouse problem: Wired or wireless mouse pointer moves by itself
Problem
I had a new hard disk drive installed on my laptop PC by a computer shop that also removed some malware. Now the mouse pointer moves by itself and wreaks havoc with my typing. The same problem occurs with a wired or a wireless USB mouse. The wireless mouse is using new batteries.
Answer
That could be a hardware problem (a faulty mouse), but you have tried two mice – wired and wireless – that have the same problem. It could be a device-driver problem, especially since you have installed the software for more than one mouse, but that is unlikely. The problem is most probably being caused by a conflict with other software, such as malware, which you have already had removed.
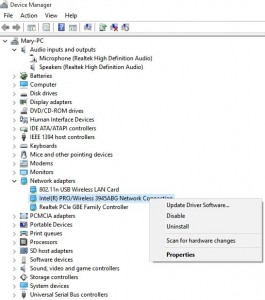
Try opening the Device Manager. Locate and open the heading called Mice and other pointing devices. If you right-click on the entry for the mouse, you can used the Uninstall option to remove the device driver. Rebooting the system makes Windows reinstall the device driver, which may have become corrupt.

If the problem still exists, scan the system for malware, which could still be present in the system. Try using a different scanner than the one you usually use. At the time of writing this, the Panda Free Antivirus was free. Update your choice online after installation and scan your system. You can also use the excellent free online scanners, such as Kaspersky Security Scan and ESET Free Virus Scan.
If doing that doesn’t work, disable the startup programs. A link has been provided below for an article that shows you how to disable startup programs.
In Windows XP, enter msconfig in the Start => Run box. In Windows Vista, enter the command in the Start => Start Search box. In Windows 7, enter it in the Start => Search programs and files box. In Windows 10, you have to use the Task Manager.
Running msconfig brings up the System Configuration Utility. Click the Startup tab followed by the Disable All button. Click on the Services tab and use your mouse to place a check mark in the box beside Hide Microsoft Services. Remove the check marks for every service except the essential services for anti-virus, firewall, etc., which you should be familiar with and should be named there. Restart your computer.
On restarting, Windows warns you that the system configuration has changed and it will offer to run MSConfig. Choose No, and place a check mark in the box that says “Do not ask again” or the message will reappear every time the computer starts up.
How to Disable Startup Programs in Windows [WinXP, Vista, Win7] –
http://www.howtogeek.com/74523/how-to-disable-startup-programs-in-windows/
Here is how to use the Task Manager in Windows 10 to do that:
How to change Windows 10 startup programs: Speed up your PC by removing unnecessary apps –
http://www.pcadvisor.co.uk/how-to/windows/how-change-windows-10-startup-programs-3615075/
If doing that fixes the problem, re-enable entries a few at a time, restarting the computer after every change, until you discover which entry is the cause of the problem. You can use a web-search engine to find out what that entry does and if there is an update for it if it is a valid program.